...
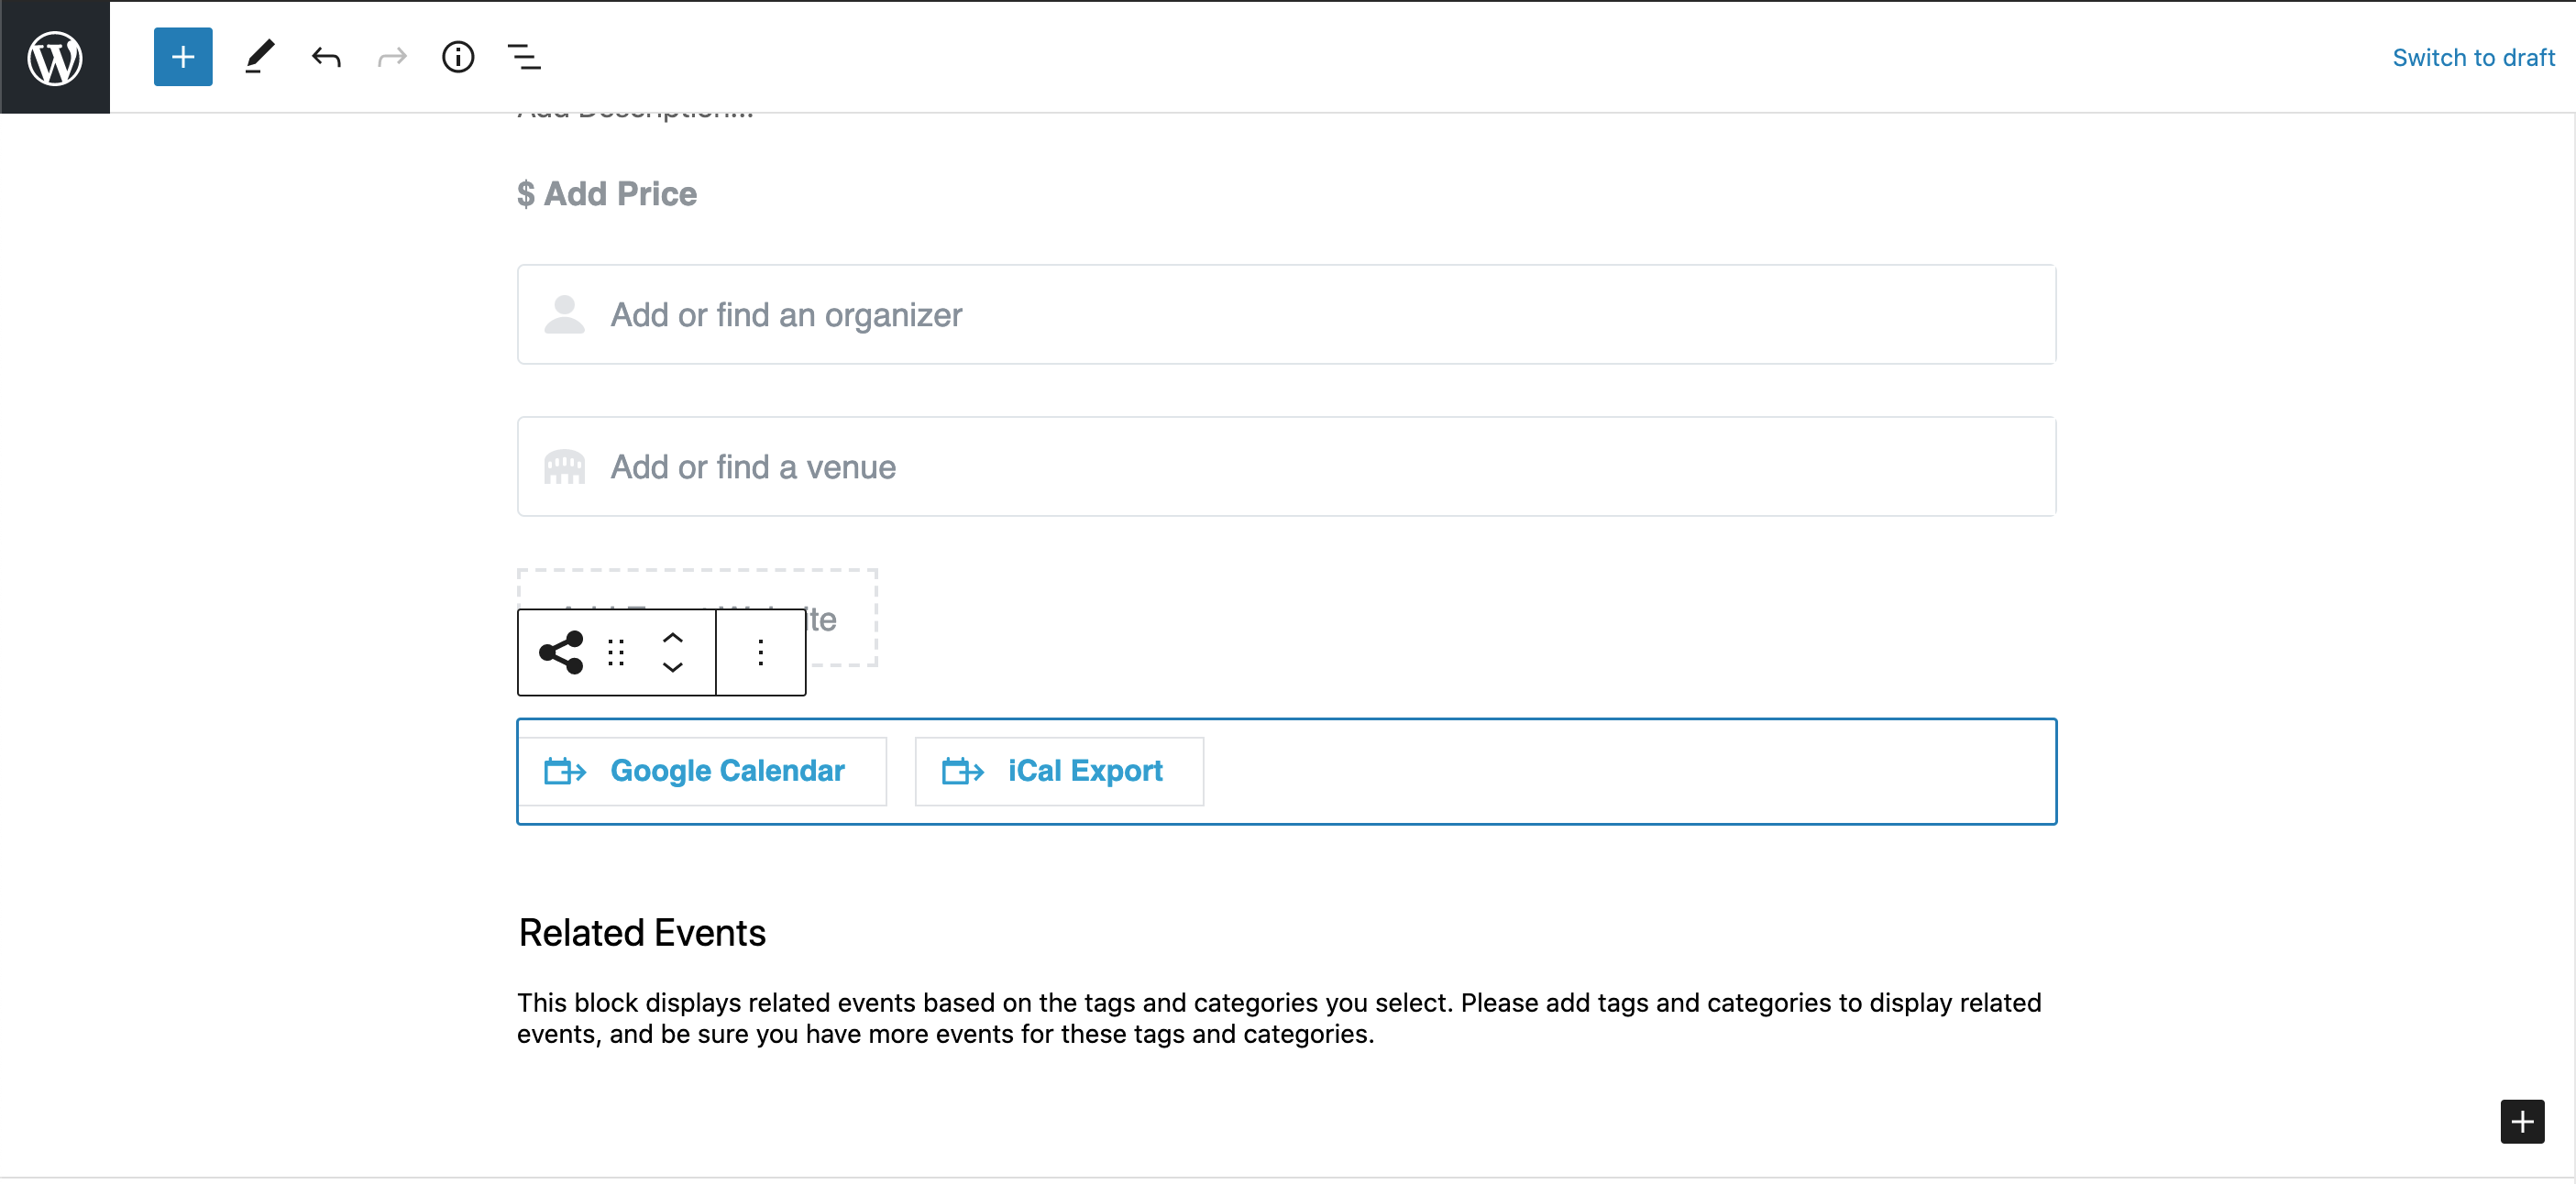
Enter the cost for attending the event.
Leave blank if your event is free. (You can always mention the event is free in your event description.)
Organizer (optional)
Start typing in the name of your group/dept., look for an existing entry to appear, and select it. Don't create a duplicate entry.
...
You can add a new organizer if yours is not in the list.
Or leave blank if desired.
Location/Venue
...
(required for in-person events)
Leave this field blank for virtual events.
Start For in-person events, start typing in the name of your venue, look for an existing venue to appear, and select it. Don't create a duplicate entry.
...
- Make sure the copy on the button gives users a clear idea of what happens when they click it.
- Registration buttons should say Register for this event or Register now
- Virtual events with no registration can have buttons that say Join us on Zoom (or whatever platform you are using for the event)
- Button copy should be sentence case (only the first word and important/proper nouns are capitalized)
- You can move the button higher up or lower on the page if desired.
- First click on the button and then use the up and down arrows in the toolbar to move it.
Or leave this field blank if desired.
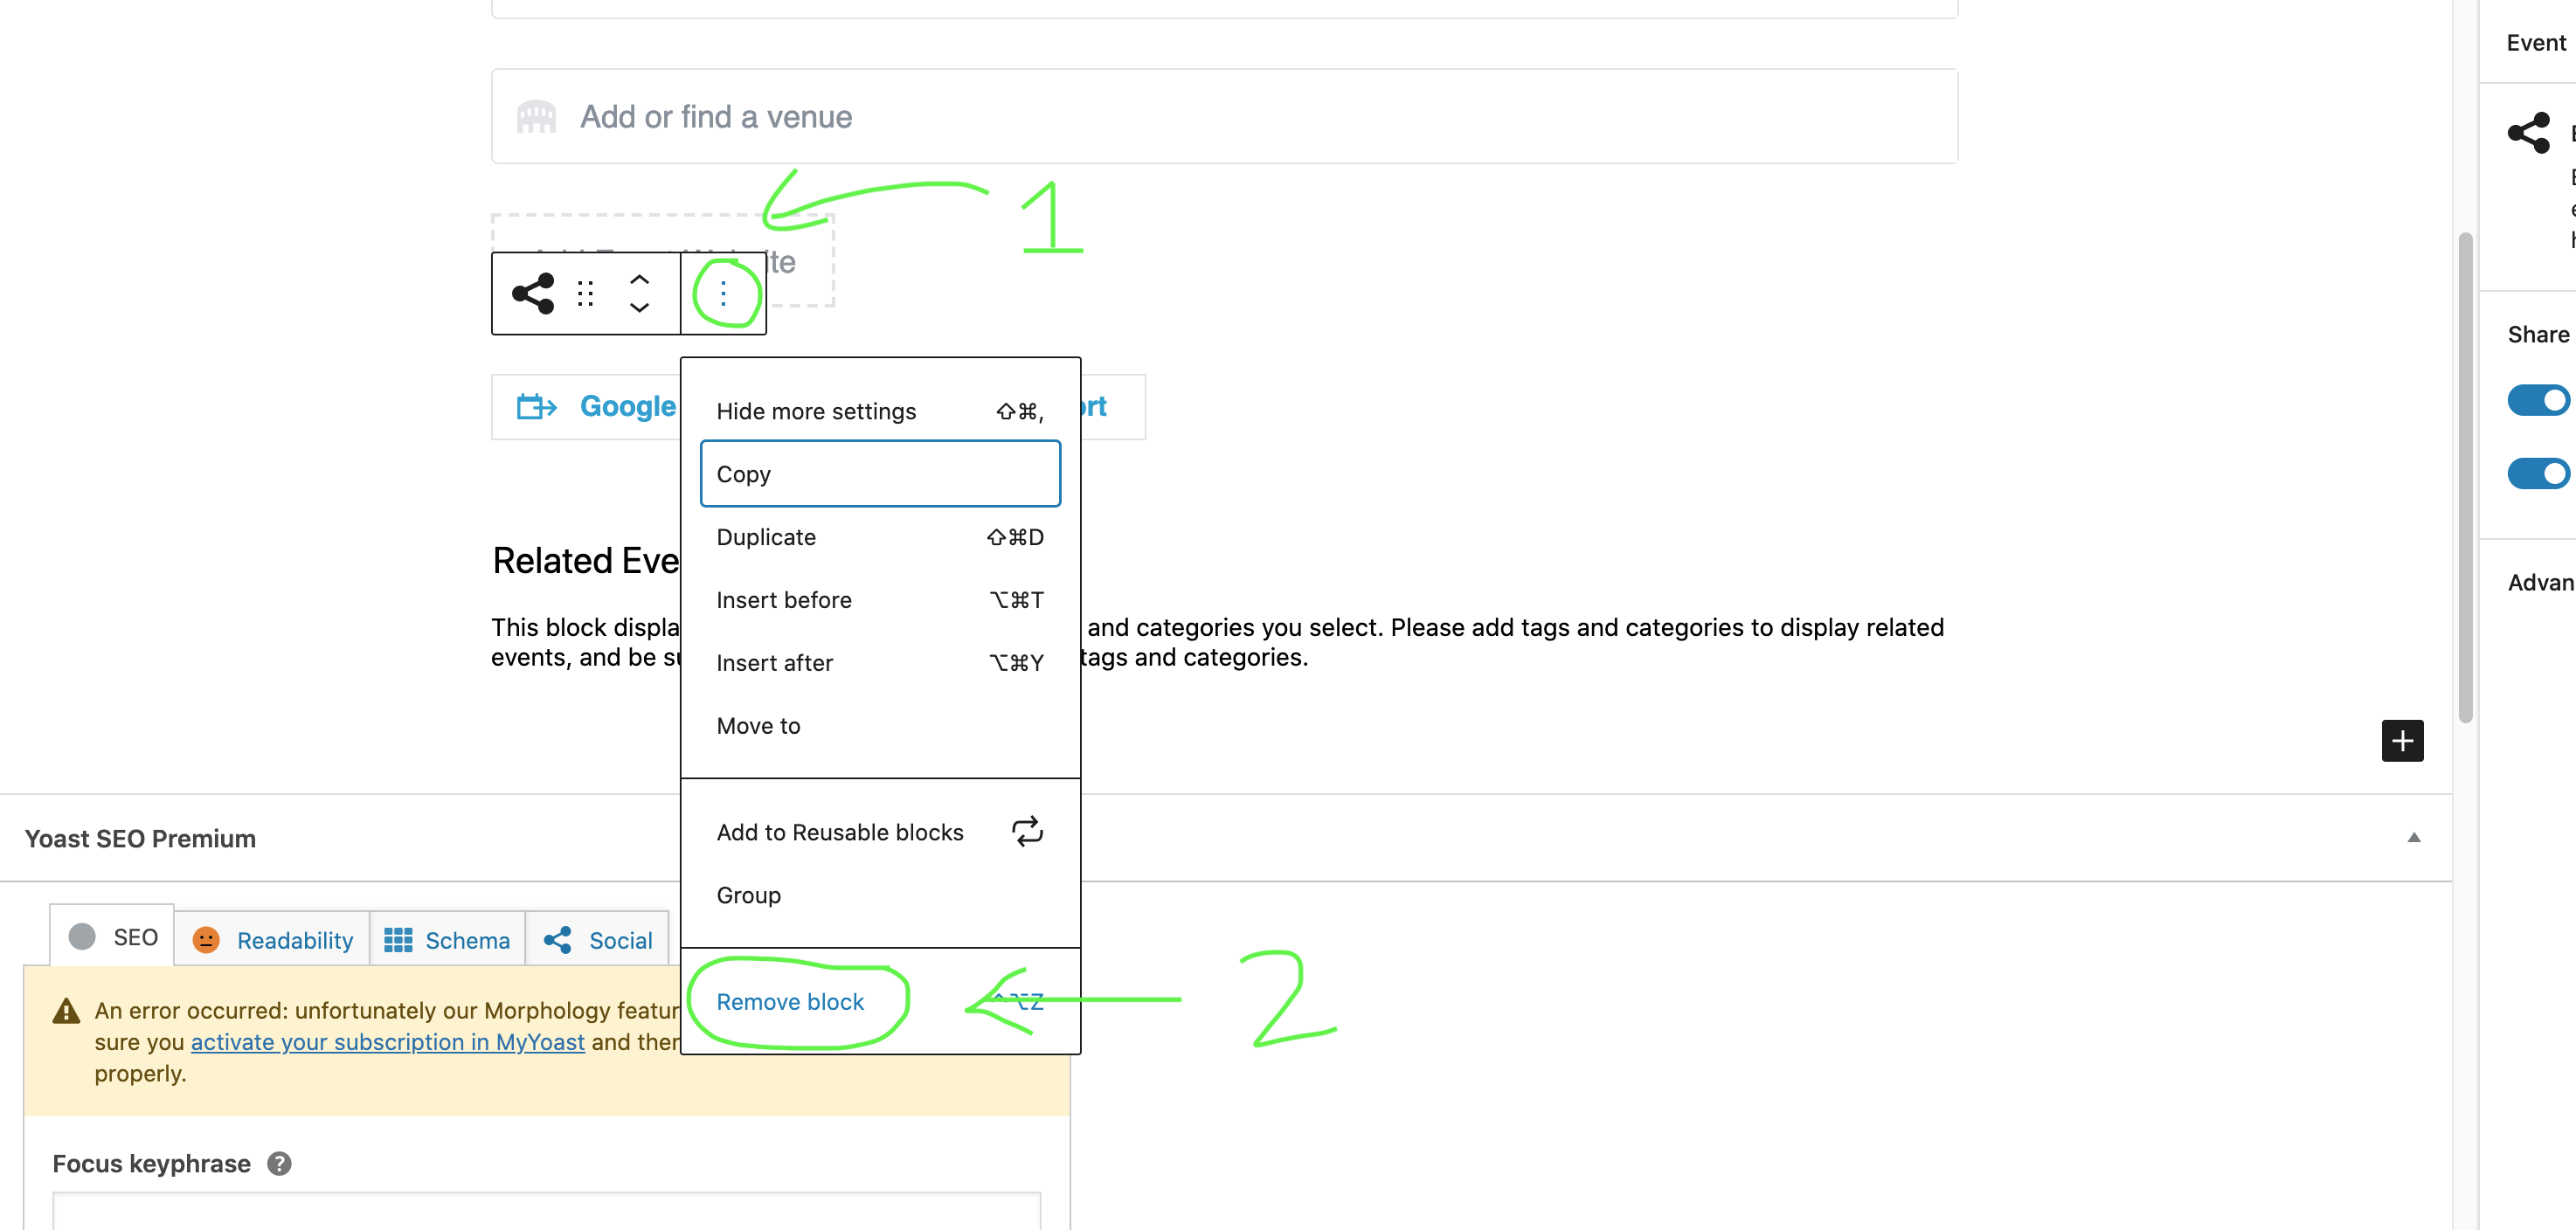
Event Sharing (Calendar Export) Buttons (optional)
These are automatically added to all events. These cannot be edited, but can be removed if you likeprefer. These cannot be edited.
To remove the calendar export buttons:
- Click on or near the calendar buttons to get a blue outline around all buttons in the row.
- Click the three vertical dots in the toolbar and select Remove block
Related Events
Make sure this block stays at the very bottom of the event editor.
On the event page, the calendar plugin will pull in up to 3 upcoming events that have the same category/categories.
This block can be removed if desired.
Right Side Menu Options
Tags (do not use)
Do not use any tags. Use only categories with events.
Categories (required)
Categories are what pull specific events onto different pages across our website.
- If an event doesn't have a category, it will only appear in the main event calendar listing. New categories are not automatically set up to pull to a specific web page. Please reach out to the web team if you have questions about which pages show which types of eventsThis is not the primary place our users are looking at events, so it is important that all events are categorized.
- You can choose multiple categories for a single event.
- Some categories are nested within a specific program. For instance, BBA program has a leadership events category. If your program has leadership events and you would like a category for those, you will need to create a new category nested beneath your program/dept. category. Please reach out to the web team if you need help adding categories for your events.
- Note: Creating a new category will not automatically start to pull related events onto a specific web page. Please reach out to the web team if you have questions about which pages show which types of events or if you would like to create a new event category for a specific web page.
Find category editing in the right hand menu.
- First click on the Event tab under the Preview button
- Scroll down the right menu until you see Event Categories. Click the caret to open the section if it is collapsed.
- Check the list for your category before adding it so you don't duplicate an entry.
...
Featured image dimensions: 1200px wide x 450px tall (this image size is only for featured images for events)
- Add your image by clicking the box that says Set featured image and following the directions above for selecting or uploading images to the media library.
- Check Be sure to check your image in a preview window to make sure it looks good.
- Images must have alt text – this is a requirement for accessibility.
- Alt text should include a brief description of what is in the image
- If the image has text in it, alt text must include all of that text for accessibility (someone using a screenreader needs to be able to access the text in the image – alt text is the only way to do that).
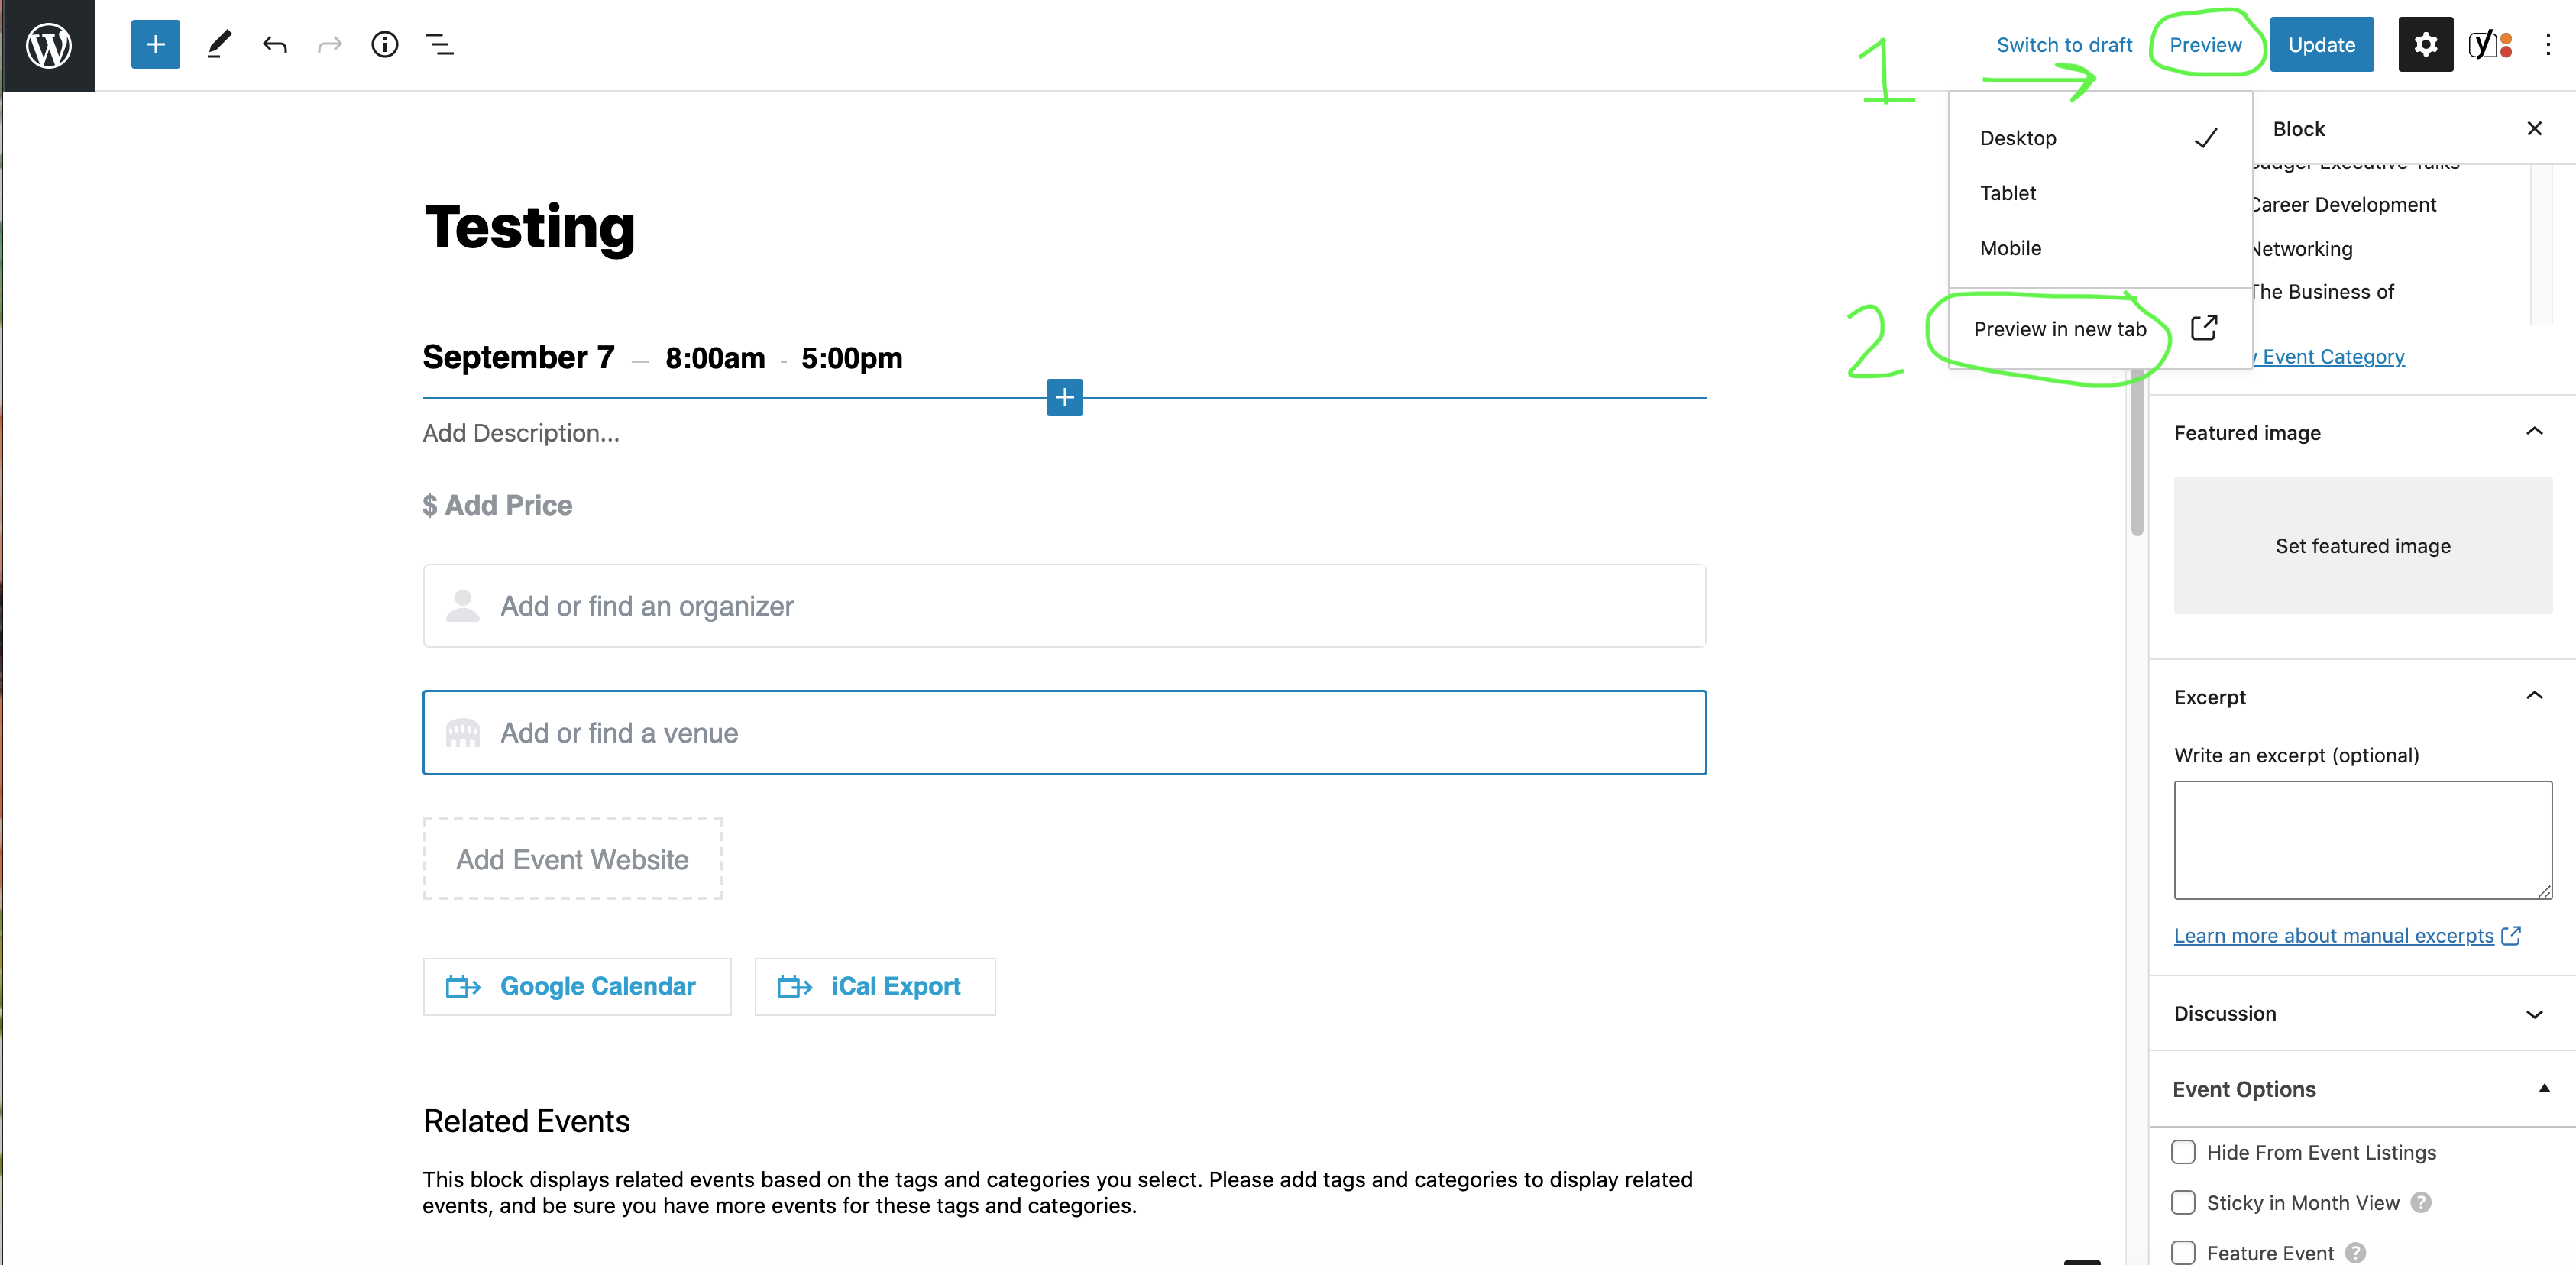
Preview an Event
In upper right corner of the event editor, click Preview, then Preview in a new tab.
Save as a Draft vs. Publish
Save as a draft
- Choose this option when you need to save your event, but you aren't ready to publish it yet.
- You can share the draft with others on your team who have event editing access. They can finish editing if needed.
Publish
- You must publish your event for it to be visible to everyone on the website.
- All subsequent changes to your event must be published.
Edit/Delete Existing
...
Events
- Similar to creating an event, navigate to Events and choose yours from the list or use the search to find it.
- Hover over the name of the event to see options for editing or deleting your event.