This training documentation is a substitution for a 3-4 hour long training session. Please review it thoroughly prior to creating emails.
- General Eloqua documentation (UW-Madison wide)
- How to Request access
- How to Login
- Building an email in Eloqua
- Common pitfalls/mistakes to watch out for
- Accessibility quick tips
- Presend Checklist
- Sending your first email
- File Organization within Eloqua
- WSB Brand Guidelines for emails
- How to create a non-Eloqua sent email in Eloqua
- Creating engaging email content (UW-Madison IT)
How to Login to Eloqua:
- Open up the Firefox browser (you may need to download the most recent version). Eloqua is buggy with other browsers.
- Go to login.eloqua.com
- Ignore the sign in fields and select "Sign in with SSO or another account"

- In the "Company Name" field, type in "uwmadison" (not case sensitive) and click "Sign in"

- It will redirect you to your typical wisc.edu login, where you can login as usual.

- If you get an error, you probably need to request Eloqua access
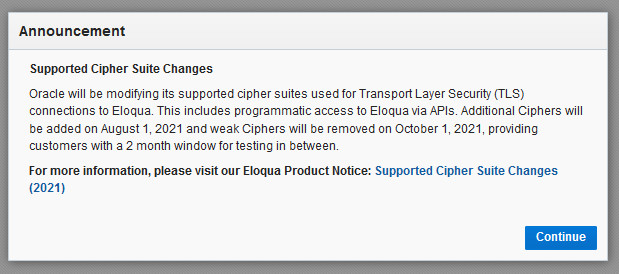
- You may see an Announcement page, you can ignore this and click "Continue"
- Otherwise, you will be brought to the main Eloqua page. It will look something like this.

Building an Email in Eloqua
After you've logged in, you can start building emails!
Here is a recording of the training session for Eloqua Emails: Part 1
If you want a more specific breakdown of the email templates, check out the parts of the email documentation.
Note: If you will be sending Eloqua-created emails using a different email distributor (such as LRM or Constant Contact), here's some documentation on what to do differently: How to create a non-Eloqua sent email in Eloqua
Common Pitfalls/ Things to be careful of:
- When sending a test email, do not use the "Email Checker" option. It checks emails by clicking on all the links, which includes the unsubscribe button. Always select "HTML email" instead.
- The sender email must always end in "@explore.wisc.edu". Any others will cause the email to bounce, and your email will be marked as invalid.
- Fill out your sender properties according to the guidelines.
- Make sure to select a folder whenever you upload/create anything (photos, emails, etc). If you add something to the root folder, please move it to the appropriate department folder afterwards.
- When creating an email, choose one of the templates for your specific department.
- When uploading contacts, be careful when entering info, since it will override the contact's info for all other groups (across UW-Madison)
- Prior to activating an email, go over the Presend Checklist
- Don't forget to fill out preview text! It's optional, but if you don't fill it out, the first thing a user will see under the subject line will be "Trouble viewing this email?"
- When uploading a photo from within an email, make sure to select a folder for it to go into. Otherwise, it will end up in the root folder "all"!
- Rather than uploading from your email, it's better to upload your photos from within the image library itself (you can open another tab in Eloqua if you want to keep your email open) by going to Assets>Components>Images and navigating to the folder you want to upload to, then click "Upload" in the top right corner. From there, you can upload multiple images at a time.
- Eloqua will prevent you from sending the same email to the same person twice, even if you completely change the email. Make sure you're creating a new email, not just editing an old one.
Accessibility Quick Tips
Ensuring accessible emails is important both for improving usability and being inclusive of all email users. The following tips are just the basics, and it's recommended you take your own time to research accessibility strategies. Review campus's email accessibility guide for details beyond these tips.
- Add alternate text to all photos, especially photos with text.
- After you've inserted a photo into the email, select it, and type into the alt text field in the left sidebar.
- Alt text should include any text that's within the photo, or a basic description of what's in the photo. If it's a headshot of a person, simple type in their name.
- Only use all caps for acronyms. Screen readers read anything in all caps letter by letter, not as a word. If you wish to emphasize text, use bold. (don't use underlines, those should be reserved for links only).
- Do not use underlines unless it's for a link! Users expect underlines to be links, and it will be confusing if they are not.
- Do not use phrases like "click here", "use this link" for links/buttons. Link text should make it clear where the user is going, with as much context as possible. "Sign up for our newsletter" "Read more about ____" "Apply now" are all decent examples of button/call to action text. When an action doesn't make sense, link text like "student resources", "list of business organizations", "our career team" might be appropriate. (This is done because screen reader users sometimes navigate by link to "skim" content. If the text linked doesn't provide enough context, a user will have to spend time figuring it out.)
- Likewise, don't include the entire URL as text in your email. Don't use: "https://www.reallylongurl.com/morewordscontinously" (this is because screen readers will spell out every letter in the link. You can imagine how tedious that is.)
- Pay attention to header hierarchy. In the case of our email templates, the H1 is used exclusively for the department name, and after that the main headers of the email are H2s. H3s should be used as subheaders of H2s.
- Design note: Please don't bold headers. They are already styled to be large.
- Use sentence case for links, buttons, and headings
Uploading Contacts, Creating Segments, and Sending Emails
Unable to click Activate on your email? You probably don't have full access.
Download for contact uploads: wsb-contact-upload-example.xlsx Note: we use "CL2" instead of "Contact Label" because it uploads contacts more quickly.
Eloqua Analytics Documentation
Note: in this video it says you can't upload custom data objects, this has since been fixed. It is recommended that if you intend to use a variable in your email (such as "Dear First Name"), you upload your contacts using custom data objects. The file below gives you the template you need, and you can follow the Eloqua documentation for uploading records to a CDO. Uploading contacts this way is often slower than using the regular contact uploader, so do so well in advance of when you need it.
Creating and Sending Your First Email Campaign
Once you've completed the training videos above, you can start creating your first email campaign. Because you're likely to need extra assistance on your first attempt, make sure to give yourself extra time to ask for help as well as for the review process after creation. (Ideally, 1-2 weeks)
If you're having trouble setting up your first email, you can contact the webteam at webteam@wsb.wisc.edu, where we can answer your questions or set up a meeting in which we can work together to make sure you're not missing any steps.
Once you think you've gotten everything ready on your email campaign, you will need the web team to review and activate it. Follow the steps on asking the web team to activate your emails. Most likely, you will have a few mistakes on your first email, so be ready to implement any feedback we give you(if you need additional assistance, we can set up a meeting). Once everything is set up correctly, we will activate (send) your email campaign.